Introduction
Managing a WordPress website requires balancing security with user convenience, especially for authentication. Implementing Single Sign-On (SSO) with Auth0 as your SAML Identity Provider (IdP) is an excellent way to achieve both. WordPress Auth0 SSO simplifies the login process by allowing users to authenticate once and access multiple websites or applications without re-entering credentials, much like using a single key for multiple doors. By setting up Auth0 WordPress SSO, you can enhance security through centralized authentication while providing a seamless and user-friendly login experience for your website visitors.
Why Use Auth0 WordPress login with SSO?
Auth0 is a leading solution for integrating SSO with WordPress, and for good reason. It offers robust security features, such as multi-factor authentication (MFA), and makes it easy to manage users. With Auth0, you can set up a WordPress SAML Auth0 integration that not only improves your site’s security but also makes life easier for your users by reducing login friction.
Getting Started with WordPress Auth0 SSO Integration
Installing the WordPress SAML SSO Plugin
To connect your WordPress site with Auth0, you’ll need to install a WordPress SAML SSO plugin. Here’s how:
- Log into WordPress: Access your WordPress admin dashboard.
- Install the Plugin: Navigate to Plugins → Add New. Search for the “Keywoot SAML SSO,” click Install Now, and then Activate.
This plugin will be the bridge that connects your WordPress site with Auth0, making the SSO integration possible.
Configuring Auth0 as Your SAML Identity Provider (IdP)
Next, you’ll set up Auth0 as your SAML Identity Provider (IdP) within WordPress:
- Create SAML Application in Auth0
- Go to the Auth0 dashboard and sign in.
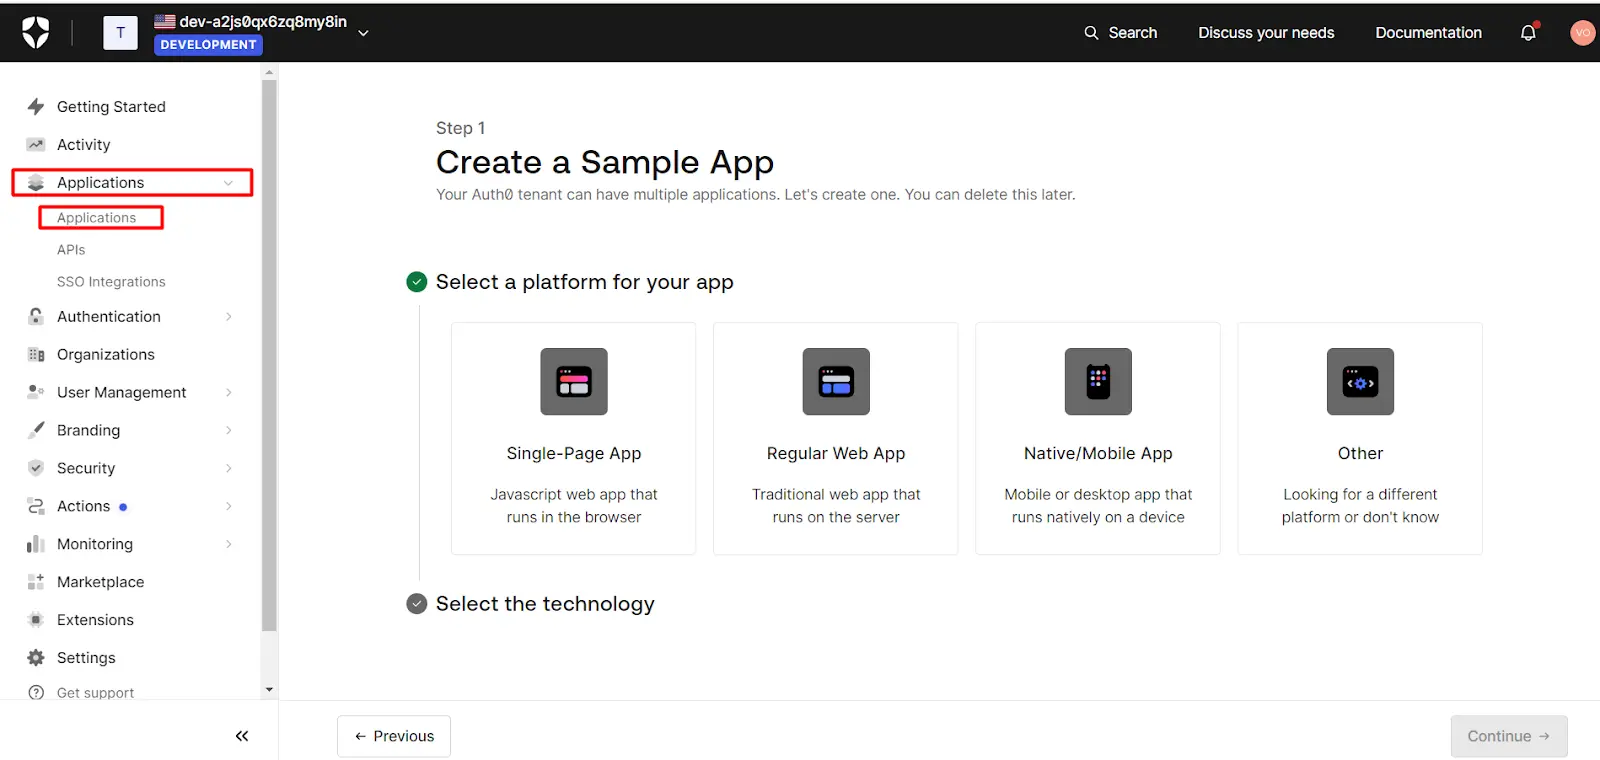
- Create a New Application by clicking Applications Tab in the sidenav.
- After Clicking on Applications, Click on the Create Application Button As shown in The screenshot
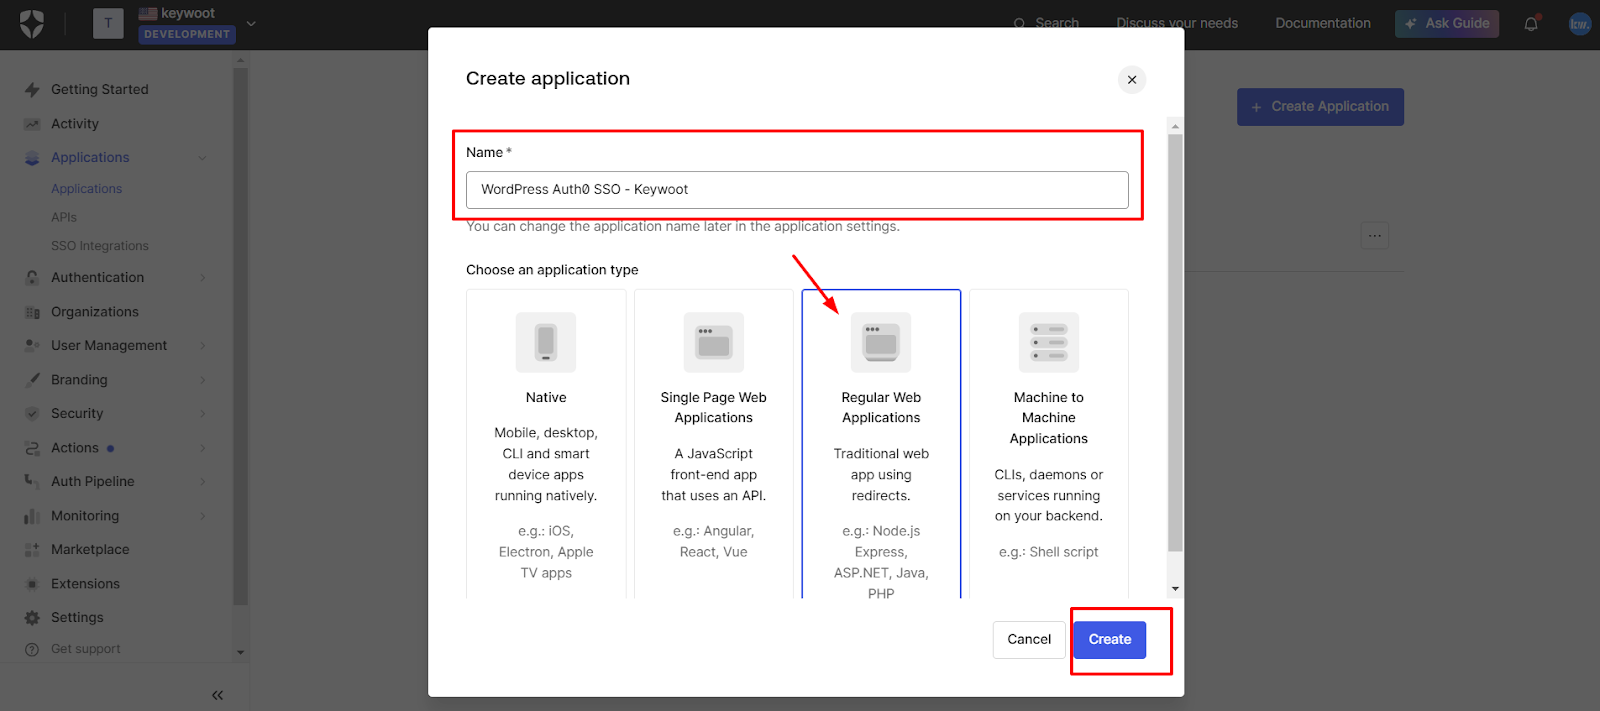
- Configuring Newly Created Application
- Name your application (e.g., “WordPress Auth0 SSO”), select “Regular Web Applications,” and then click Create.
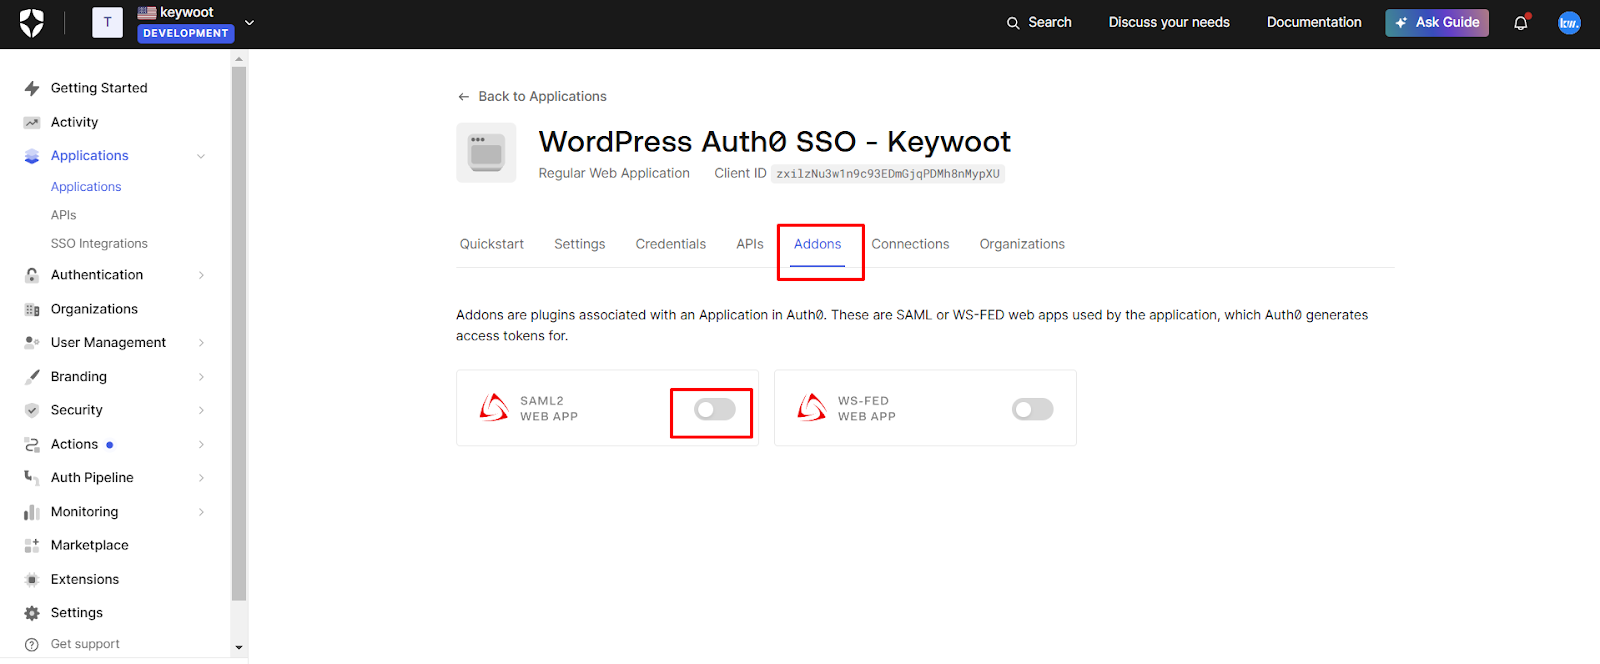
- After this, Click On the Addons tab, activate the switch button for SAML2 as shown in the below screenshot. This opens a Configuration popup.
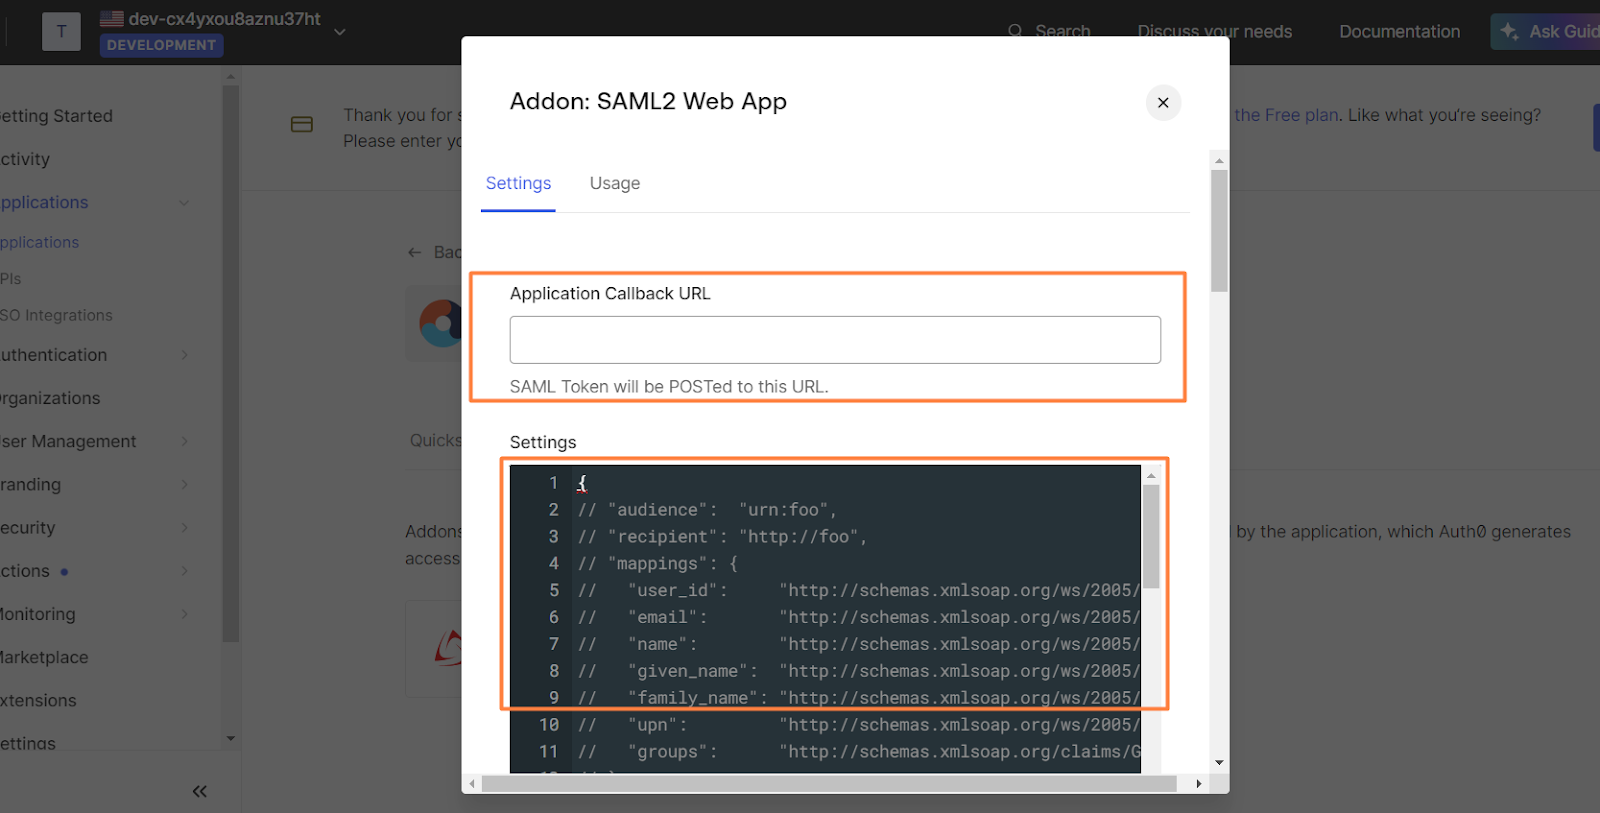
- Then Select Settings Tab in the configuration popup.
- In the Application Callback field, Fill the ACS URL (AssertionConsumerService URL), which you can find in the Metadata tab of our plugin.
- In the Settings area, copy the code below and paste it into the designated section. Ensure you make the following changes in all the places before pasting the code.
- Replace
https://KeywootPluginEntityIDwith the SP Entity ID. You can find this in the SP Metadata tab of our plugin. - Replace
http://KeywootPluginACSURLwith the ACS URL (AssertionConsumerService URL), available in the Metadata tab of our plugin. - Replace
https://KeywootPluginSingleLogoutURLby ACS Url (AssertionConsumerService URL) which can be found in Metadata Tab of our plugin.
- Replace
- After this, ScrollDown and Click on the Save.
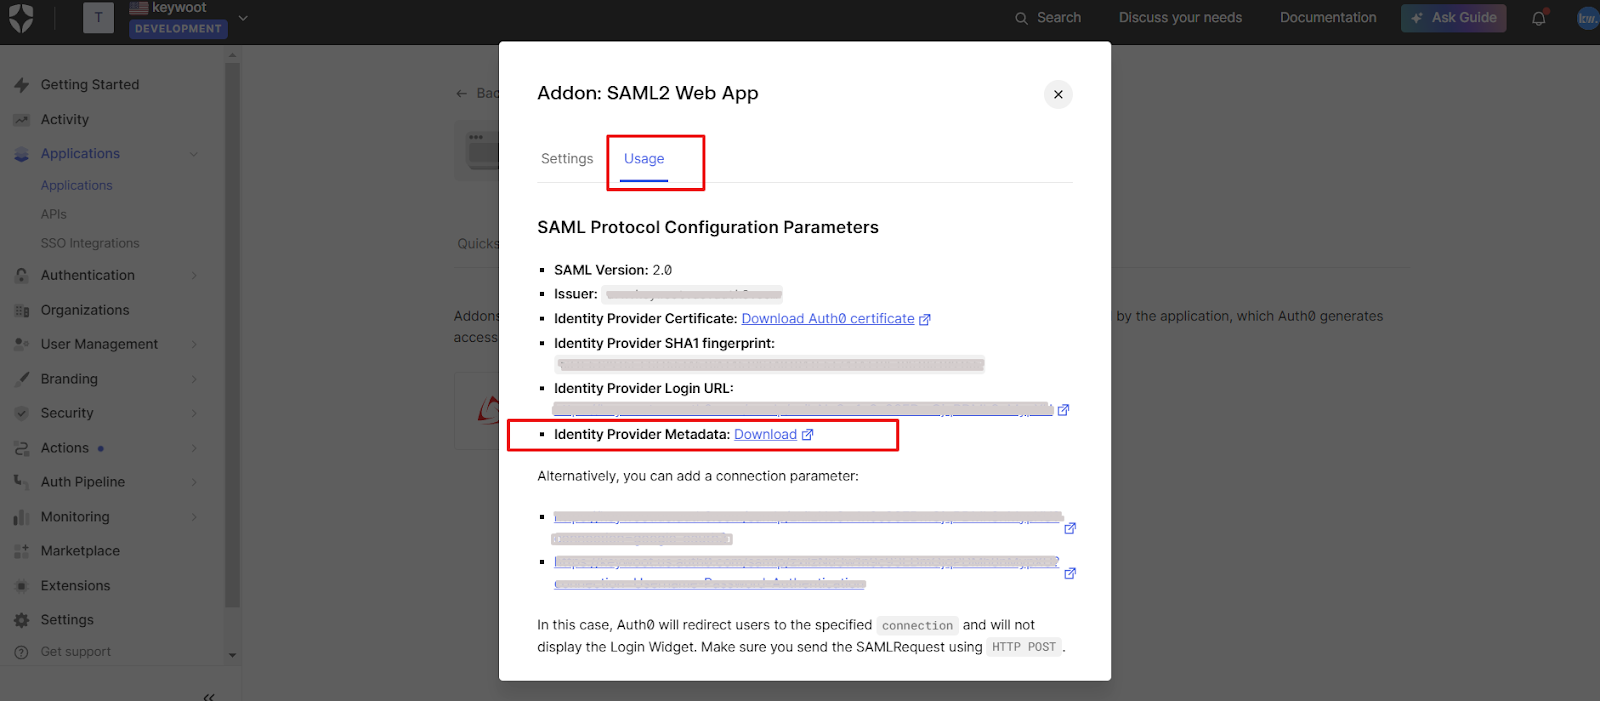
- Once Saved, Go to the Usage tab and click on the Identity Provider Metadata download link. It will download the metadata XML file which you’ll need for setting up the SAML plugin on WordPress.
Code To Paste In Settings Field
Configuring WordPress as Service Provider (SP) for Auth0 WordPress Login
- Upload IdP Metadata in WordPress SAML SSO Plugin
- In your WordPress SAML SSO plugin, navigate to the Service Provider tab.
- Click Upload IdP Metadata.
- You can either upload the metadata file you downloaded from Auth0 or use a metadata URL to fetch it.
- Test Configuration
- Click Test Configuration to verify that configuration is correct and the attributes and values sent by Auth0 are correctly received by WordPress.
- If you encounter any issues, please reach out to us at support@keywoot.com or fill the below form, including the error code shown. Our team will respond promptly to help you with the setup.
- If you are using the premium version of the plugin, you can also configure the SAML Logout URL to support Single Logout functionality.
- Add SSO on Anywhere on Your Website
- Once Test Configuration is Successful, You can either add SSO button on your WP- Login Page or anywhere on the site using Shortcode.

This integration ensures that your WordPress site can communicate securely with Auth0, allowing users to log in using their Auth0 credentials.
Configuring Premium Features for WordPress Auth0 Login
Our premium plan includes a range of advanced features listed below which are designed to provide extra functionality as per your needs. You can easily upgrade by clicking here. If you have any questions or need assistance, feel free to reach out to us at support@keywoot.com. Our team is committed to providing prompt and reliable support.
Attribute Mapping:
Attribute mapping is crucial for aligning user attributes from Auth0 with those in WordPress. To configure attribute mapping with Auth0 WordPress SSO:
- Set Up Attribute Mapping Rule in Auth0
- Go to Auth0 Dashboard and navigate to Auth Pipeline → Rules.
- Create a SAML Attributes Mapping Rule: Click Create, then scroll to the SAML Attributes Mapping template. Customize it as needed (e.g., adding department or city), then save.
- Test the Configuration: In the WordPress SAML Auth0 plugin, use the Test Configuration feature to ensure the attributes are mapped correctly.
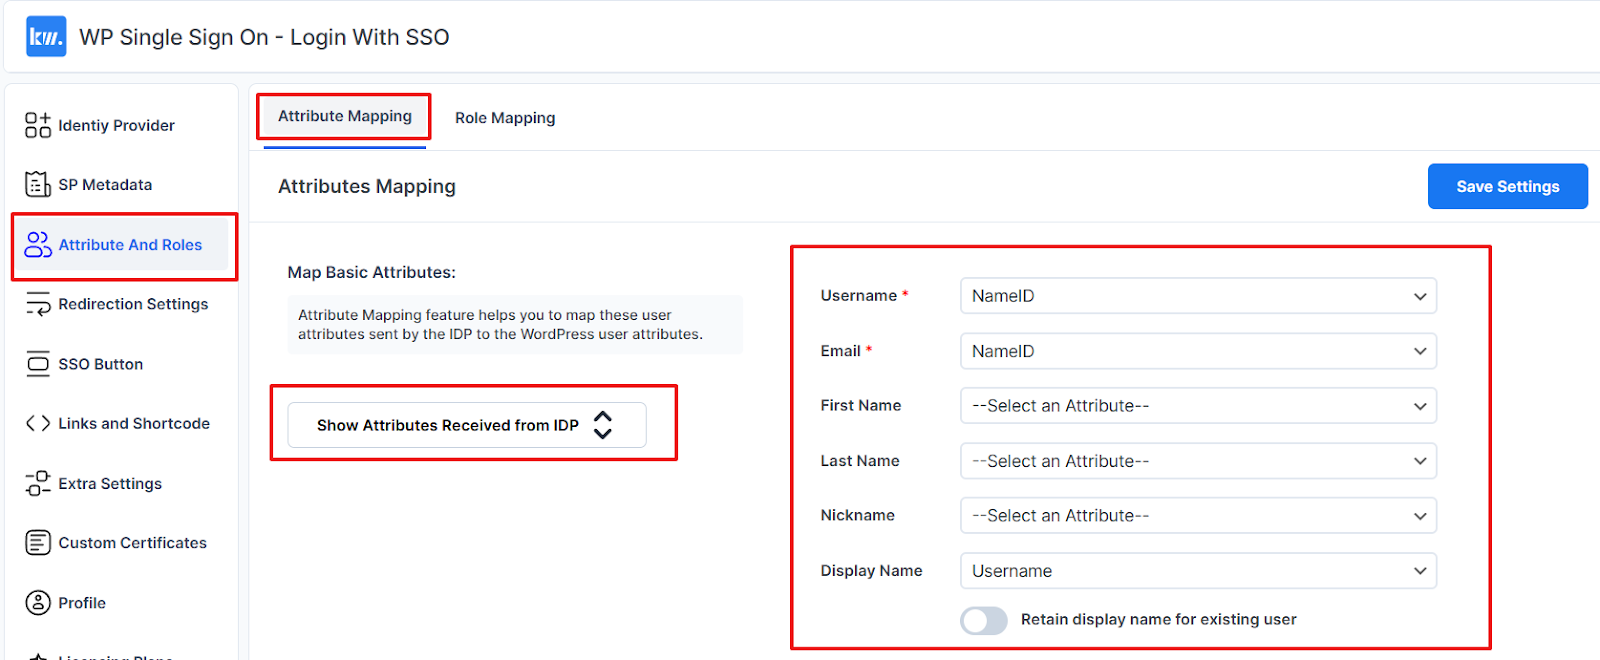
- Configuring Attribute Mapping In Plugin
- Navigate to the “Attribute and Roles” tab in the WordPress SAML SSO plugin.
- Here, you can map user attributes sent by Auth0 to corresponding attributes in WordPress.
- Fill in the required fields under the Attribute Mapping section to link attributes sent by IDP to WordPress usermeta.
- Custom Attribute Mapping :
- The custom attribute mapping feature allows for mapping any attribute from Azure AD to WordPress usermeta, providing flexibility in managing user data.
Proper attribute mapping ensures that user details like email and roles are correctly synced between Auth0 and WordPress.
Role Mapping
- Configure Role Mapping
- In the same Attribute Mapping section, set up role mappings.
- Define how Auth0 roles correspond to WordPress roles. For instance, map the Auth0 wp-editor role to the WordPress Editor role.
- Ensure that the mapping accurately reflects your organization’s role structure for proper access control.
Auto Redirections:
- Auto-Redirection from Site ( Site Access to Only Logged in User ):
- With This feature, Anyone visting your site will be automatically redirected to either IDP or WP Login Page as per your choice.
- To enable this feature, go to the “Redirection Settings” tab.
- Enable 1st option to redirect unauthenticated users to Auth0 for login and then back to their original page.
- Enable 2st option to redirect unauthenticated users to WP Login page for login.
- Auto-Redirection from WordPress Login:
- Enable “Redirect to IdP from WordPress Login Page” to redirect unauthenticated users trying to access the default WordPress login page to IDP.
- You can also enable that the backdoor login option. This provides a url which you can open wp-admin page if the above option is enabled.
Benefits of Using Auth0 for WordPress SSO
Integrating Auth0 with WordPress for SSO offers several significant benefits:
- Enhanced Security: With features like MFA and role-based access control, Auth0 strengthens your site’s defenses.
- Improved User Experience: Users enjoy a faster, smoother login process, leading to higher satisfaction and engagement.
- Streamlined Management: Centralized user management simplifies handling roles and permissions across your WordPress site.
These advantages make Auth0 a top choice for WordPress SSO, providing both security and convenience.
Conclusion
Setting up Auth0 WordPress login with SSO is a smart move for enhancing both security and user experience on your site. By following this guide, you can implement a robust WordPress Auth0 SSO solution that streamlines login processes and strengthens access control. Whether you’re running a small blog or a large enterprise site, this Auth0 WordPress login with SSO integration offers the reliability and scalability you need.
FAQs
If you encounter problems in Auth0 WordPress login with SSO, check the SAML settings and attribute mapping in both Auth0 and WordPress. Use the Test Configuration feature to identify and resolve issues.
What’s the difference between SSO and traditional login?
SSO lets users log in once and access multiple sites, whereas traditional login requires separate logins for each site.
How secure is the WordPress Auth0 SSO integration?
Auth0 provides advanced security features like MFA, ensuring a highly secure WordPress SSO integration.
Is there a free version of the WordPress SSO plugin?
Yes, the plugin offers a free version, though certain advanced features like Role Mapping And Attribute Mapping are only available in the paid version.